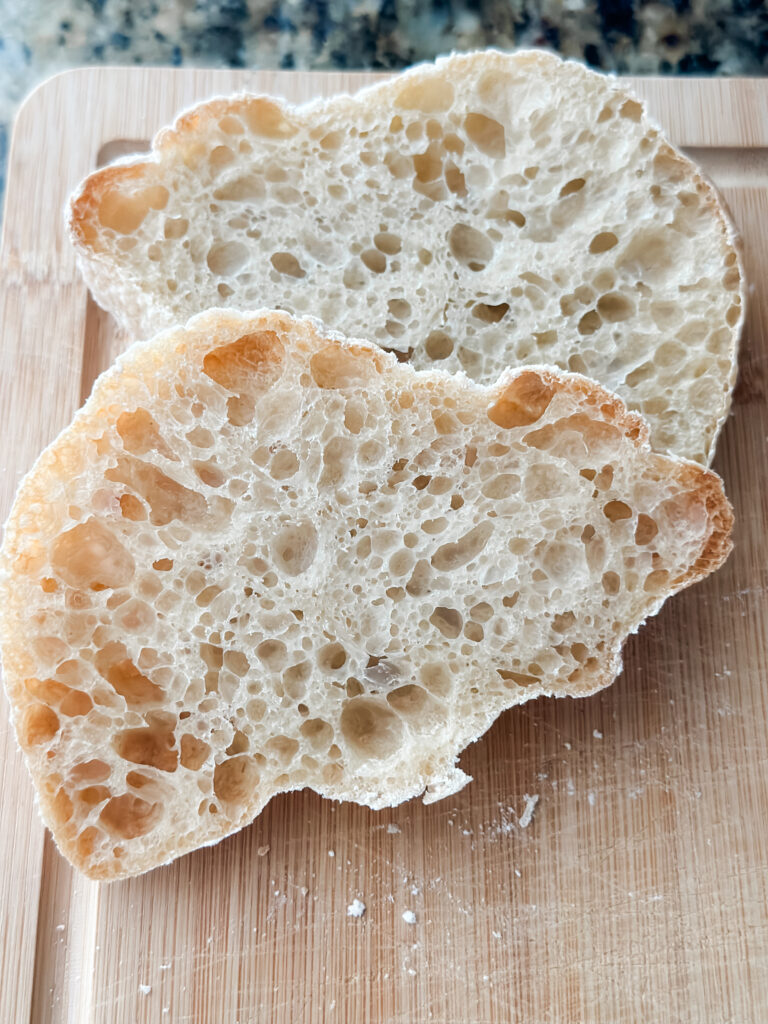
Ciabatta can be really intimidating. This easy step by step recipe will have you baking your own rustic ciabatta bread in no time. With that signature soft center and all those amazing air pockets, this be a crowd-pleaser for sure.
This recipe does need to be prepped the day before baking, so add that into your planning.

I have to admit. I was terrified of trying ciabatta. I have gotten pretty solid in my baking skills, but this recipe had me sweating. It was the perfect example of over thinking. Once I took a deep breath and decided I was just going to jump in and try, I found out that it really was not that hard.
I did lots of reading and research on the best practices and different techniques. From cold rises, to different shaping styles, to whether to flour your hands or use water. I decided to try making this the simplest of all the options and it worked!
So trust me, if I can make delicious ciabatta bread, so can you.
Before we get started, let’s talk ciabatta.
What is Ciabatta?
Ciabatta is an Italian white bread known for it’s chewy crust and soft and airy center caused by high hydration and long, slow rises.
Ciabatta means “slipper” due the classic shape of a ciabatta loaf.
Some ciabatta recipes can use milk and oil, but remember how I said “simplest version”? This one does not.
One of my favorite aspects of ciabatta, is there is no final shaping. Due to the very sticky highly hydrated dough, shaping can be quite difficult. It also gives the final product a more “rustic Italian” look in my opinion.
Ciabatta Bread Ingredients
- All Purpose flour: I use all purpose flour for this recipe. As opposed to bread flour, that gives a more structure, chewy loaf, All Purpose has enough protein to give a good rise, but will create that soft airy inside.
- Active yeast: While you can use instant yeast, I like to be sure my yeast has activated and I know my bread will rise properly. I use Fleischmann’s Active Yeast. If you choose to use instant yeast, you can mix all your sponge ingredients together at once.
- Water: This dough has higher water to flour ratio, making it very wet and sticky. Making sure your water is between 100-105 degrees will help your yeast activate.
- Salt: You can’t have a delicious recipe of anything without salt! I recommend a course sea salt or Kosher salt over table salt, as they will have a better taste.
* A note about “rising” and “proofing”. This recipe does both.
Rising is the resting process the dough goes through to allow the fermentation to take place.
Proofing is similar, expect that proofing takes place when the dough is in its final form and ready to be baked.
Let’s Make Ciabatta Bread Part 1: The Sponge
The sponge is a crucial part of making ciabatta. It is a small amount of bubbly fermented dough that is made the night before and gives your ciabatta that slightly tangy flavor. It makes this bread feel and take very similar to a sourdough.
Heat your water to about 100-105 degrees and pour it into a glass bowl.
Sprinkle your yeast on top and set it aside to activate.
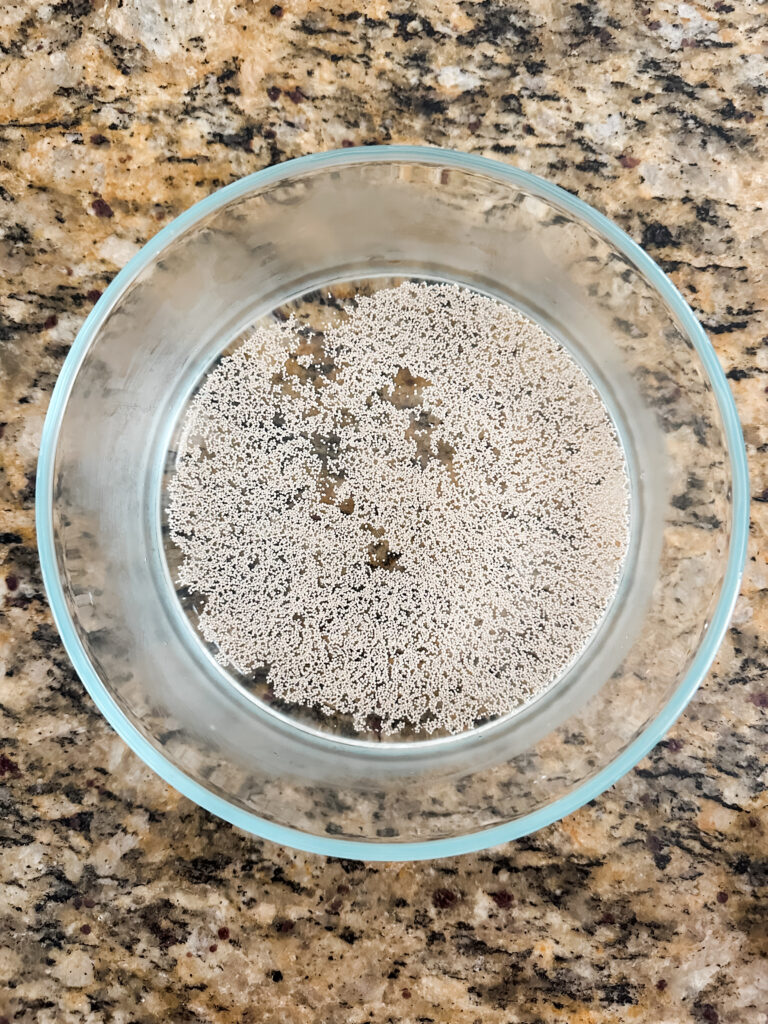

Once your yeast is bubbly, add in your flour and stir until a small ball of dough forms.
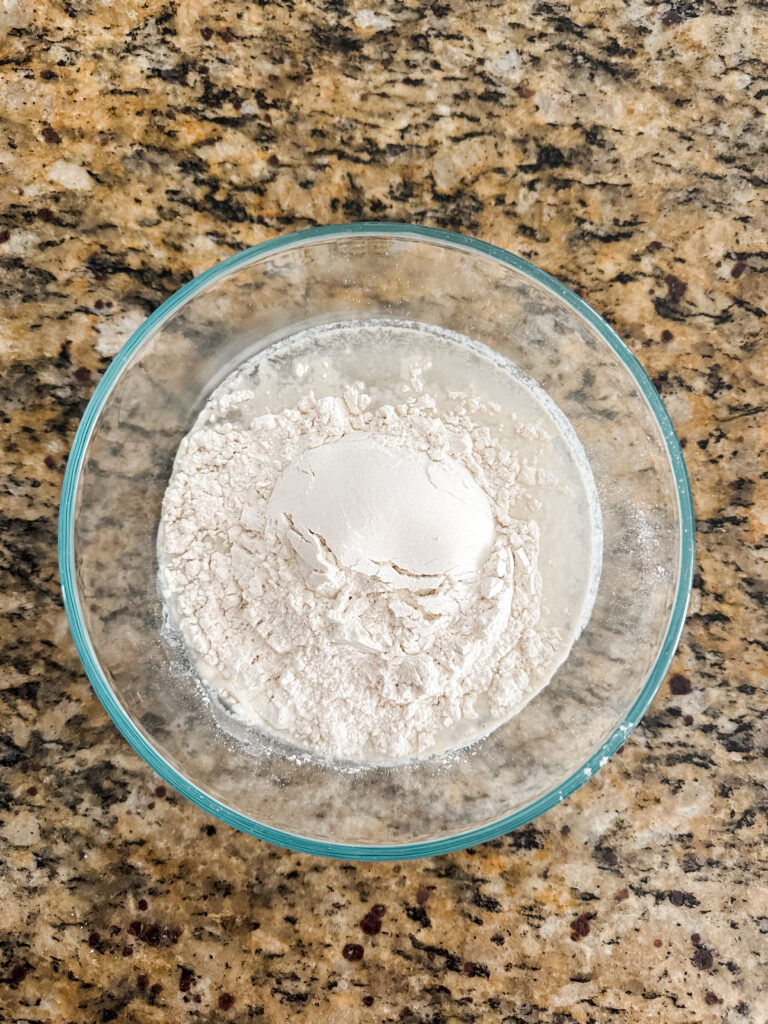

Cover tightly with plastic wrap and let rest at room temperature for at least 8 hours, and up to 24 hours. I made my sponge in the evening of night before and let it sit on my counter overnight.
Let’s Make Ciabatta Bread Part 2: The Dough
When you are ready to start the dough, your sponge should be nice and bubbly. Look at those bubbles!
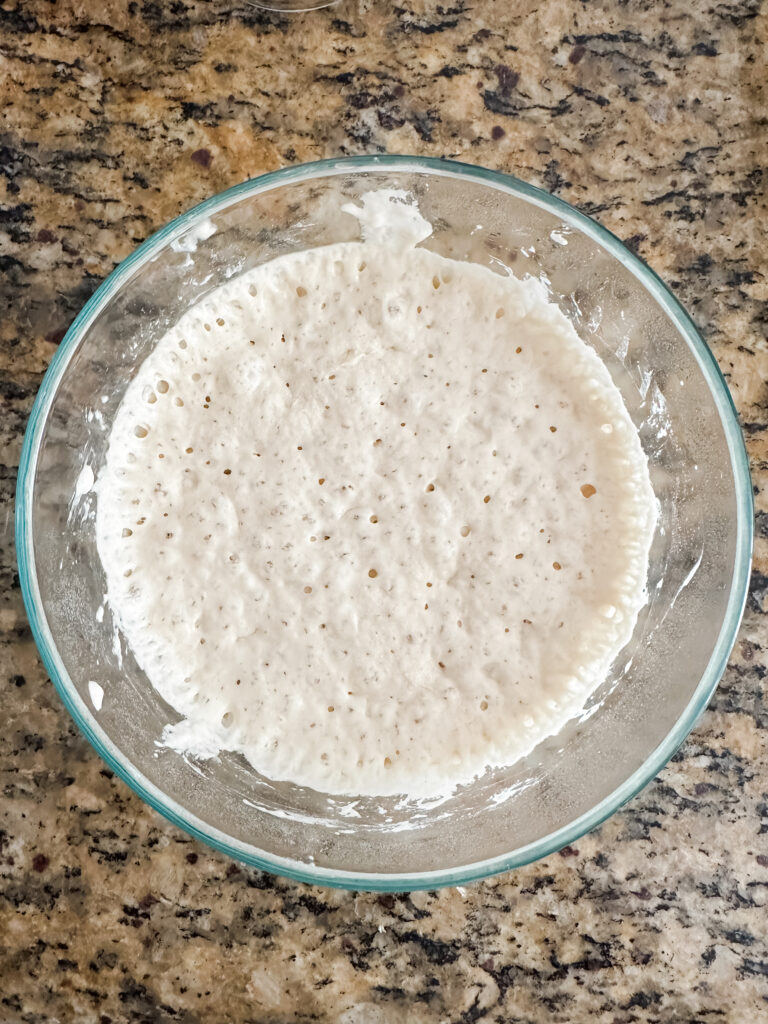

Empty your sponge into your mixer bowl and attach the dough hook. I find that using a silicone scraper works the best when transferring your sponge to your mixer.
Add your dough ingredients and knead together on low speed for 1-2 minutes until roughly combined.


Bump the speed up to medium and knead for about 5-7 minutes. Your dough should be shiny, smooth, and very sticky.

Turn your dough out into a container that has an airtight lid. I highly recommend using a silicone scraper to help. I got this one from Amazon and I love it!
I used a large Tupperware that would give my dough room to expand. Keeping it sealed will help trap those fermentation gases and keep your dough from drying out. Remember that we want our ciabatta dough really hydrated.

Let your dough rest at room temperature for 1 hour and it should about double in size.

You are going to perform a round of stretch and folds by gently scooping underneath your dough, stretching it up, and folding it into the center. I recommend making sure your fingers are wet with water to keep them from sticking to the dough too much. Your “fold” may look more like a “slap” to help the dough stay put.


Once you have worked your way around your dough, cover it and let is rest for 30 minutes.

You will complete 2 more rounds of stretch and folds, for a total of 3 rounds, with a 30 minutes rest between each one.
After the final rest, generously flour your working surface and turn your dough out.

With well floured hands, press your dough out into a rectangle. You may need to sprinkle the surface of the dough with flour as well.

Using a dough slicer, cut the dough in half length wise.
Cut each half into 4 sections. Remember you do not need to shape them.

Sprinkle the dough with a good amount of flour and cover with a tea towel. They are going to rest and proof right where they are for 2 hours.

About an hour before you the dough is done proofing, set your oven to 450 degrees and preheat your cookie sheet.

Using your silicone scraper, gently transfer your dough onto a piece of parchment paper. This can be a bit tricky. I found that swiftly scooping the scraper under the dough helps to keep the general shape and makes the transfer easier.

Carefully transfer the parchment paper onto the preheated cookie sheet.
Bake for 20-25 minutes or until golden brown.

Let them cool for 20-30 minutes.
Slice and enjoy!


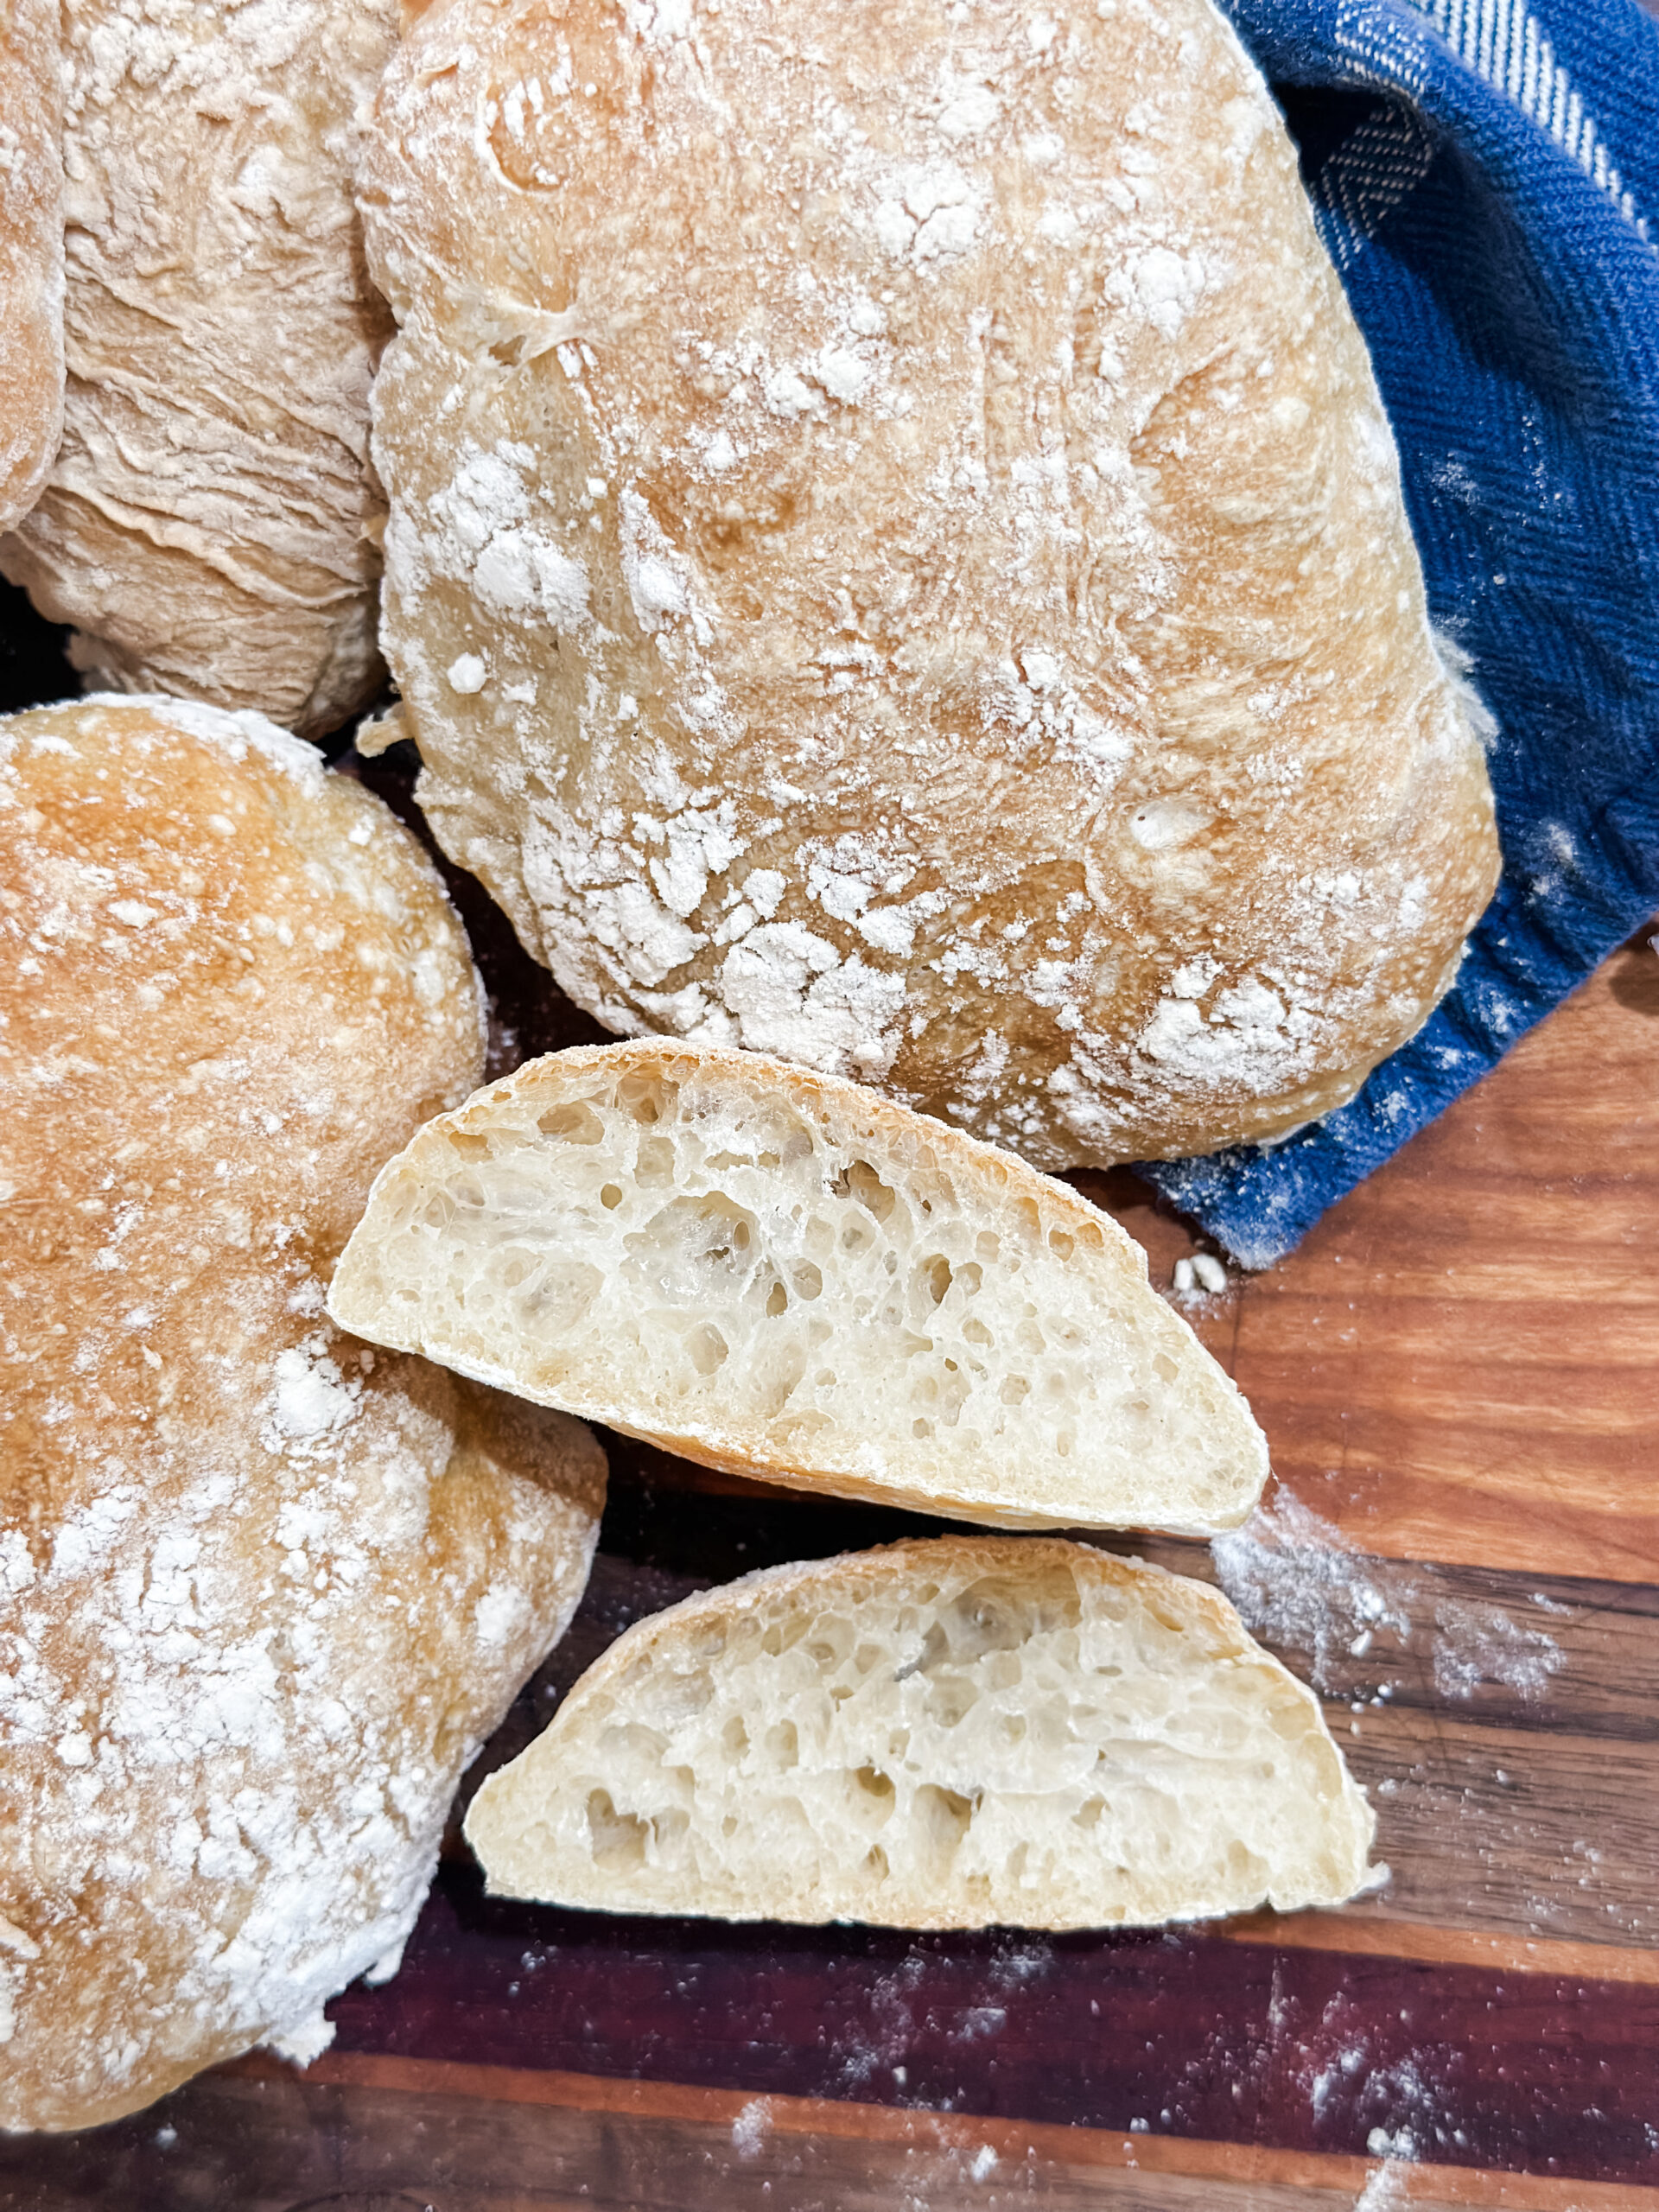

How to Enjoy Your Ciabatta
Any way you like!
- The signature air pockets make this bread perfect for dipping in your favorite sauce or soup.
- Slice and toast to make the perfect base for a Caprese appetizer.
- Create delicious deli sandwiches or grilled cheese.
- Just toast and slather with butter or honey butter.
How to Store Your Bread
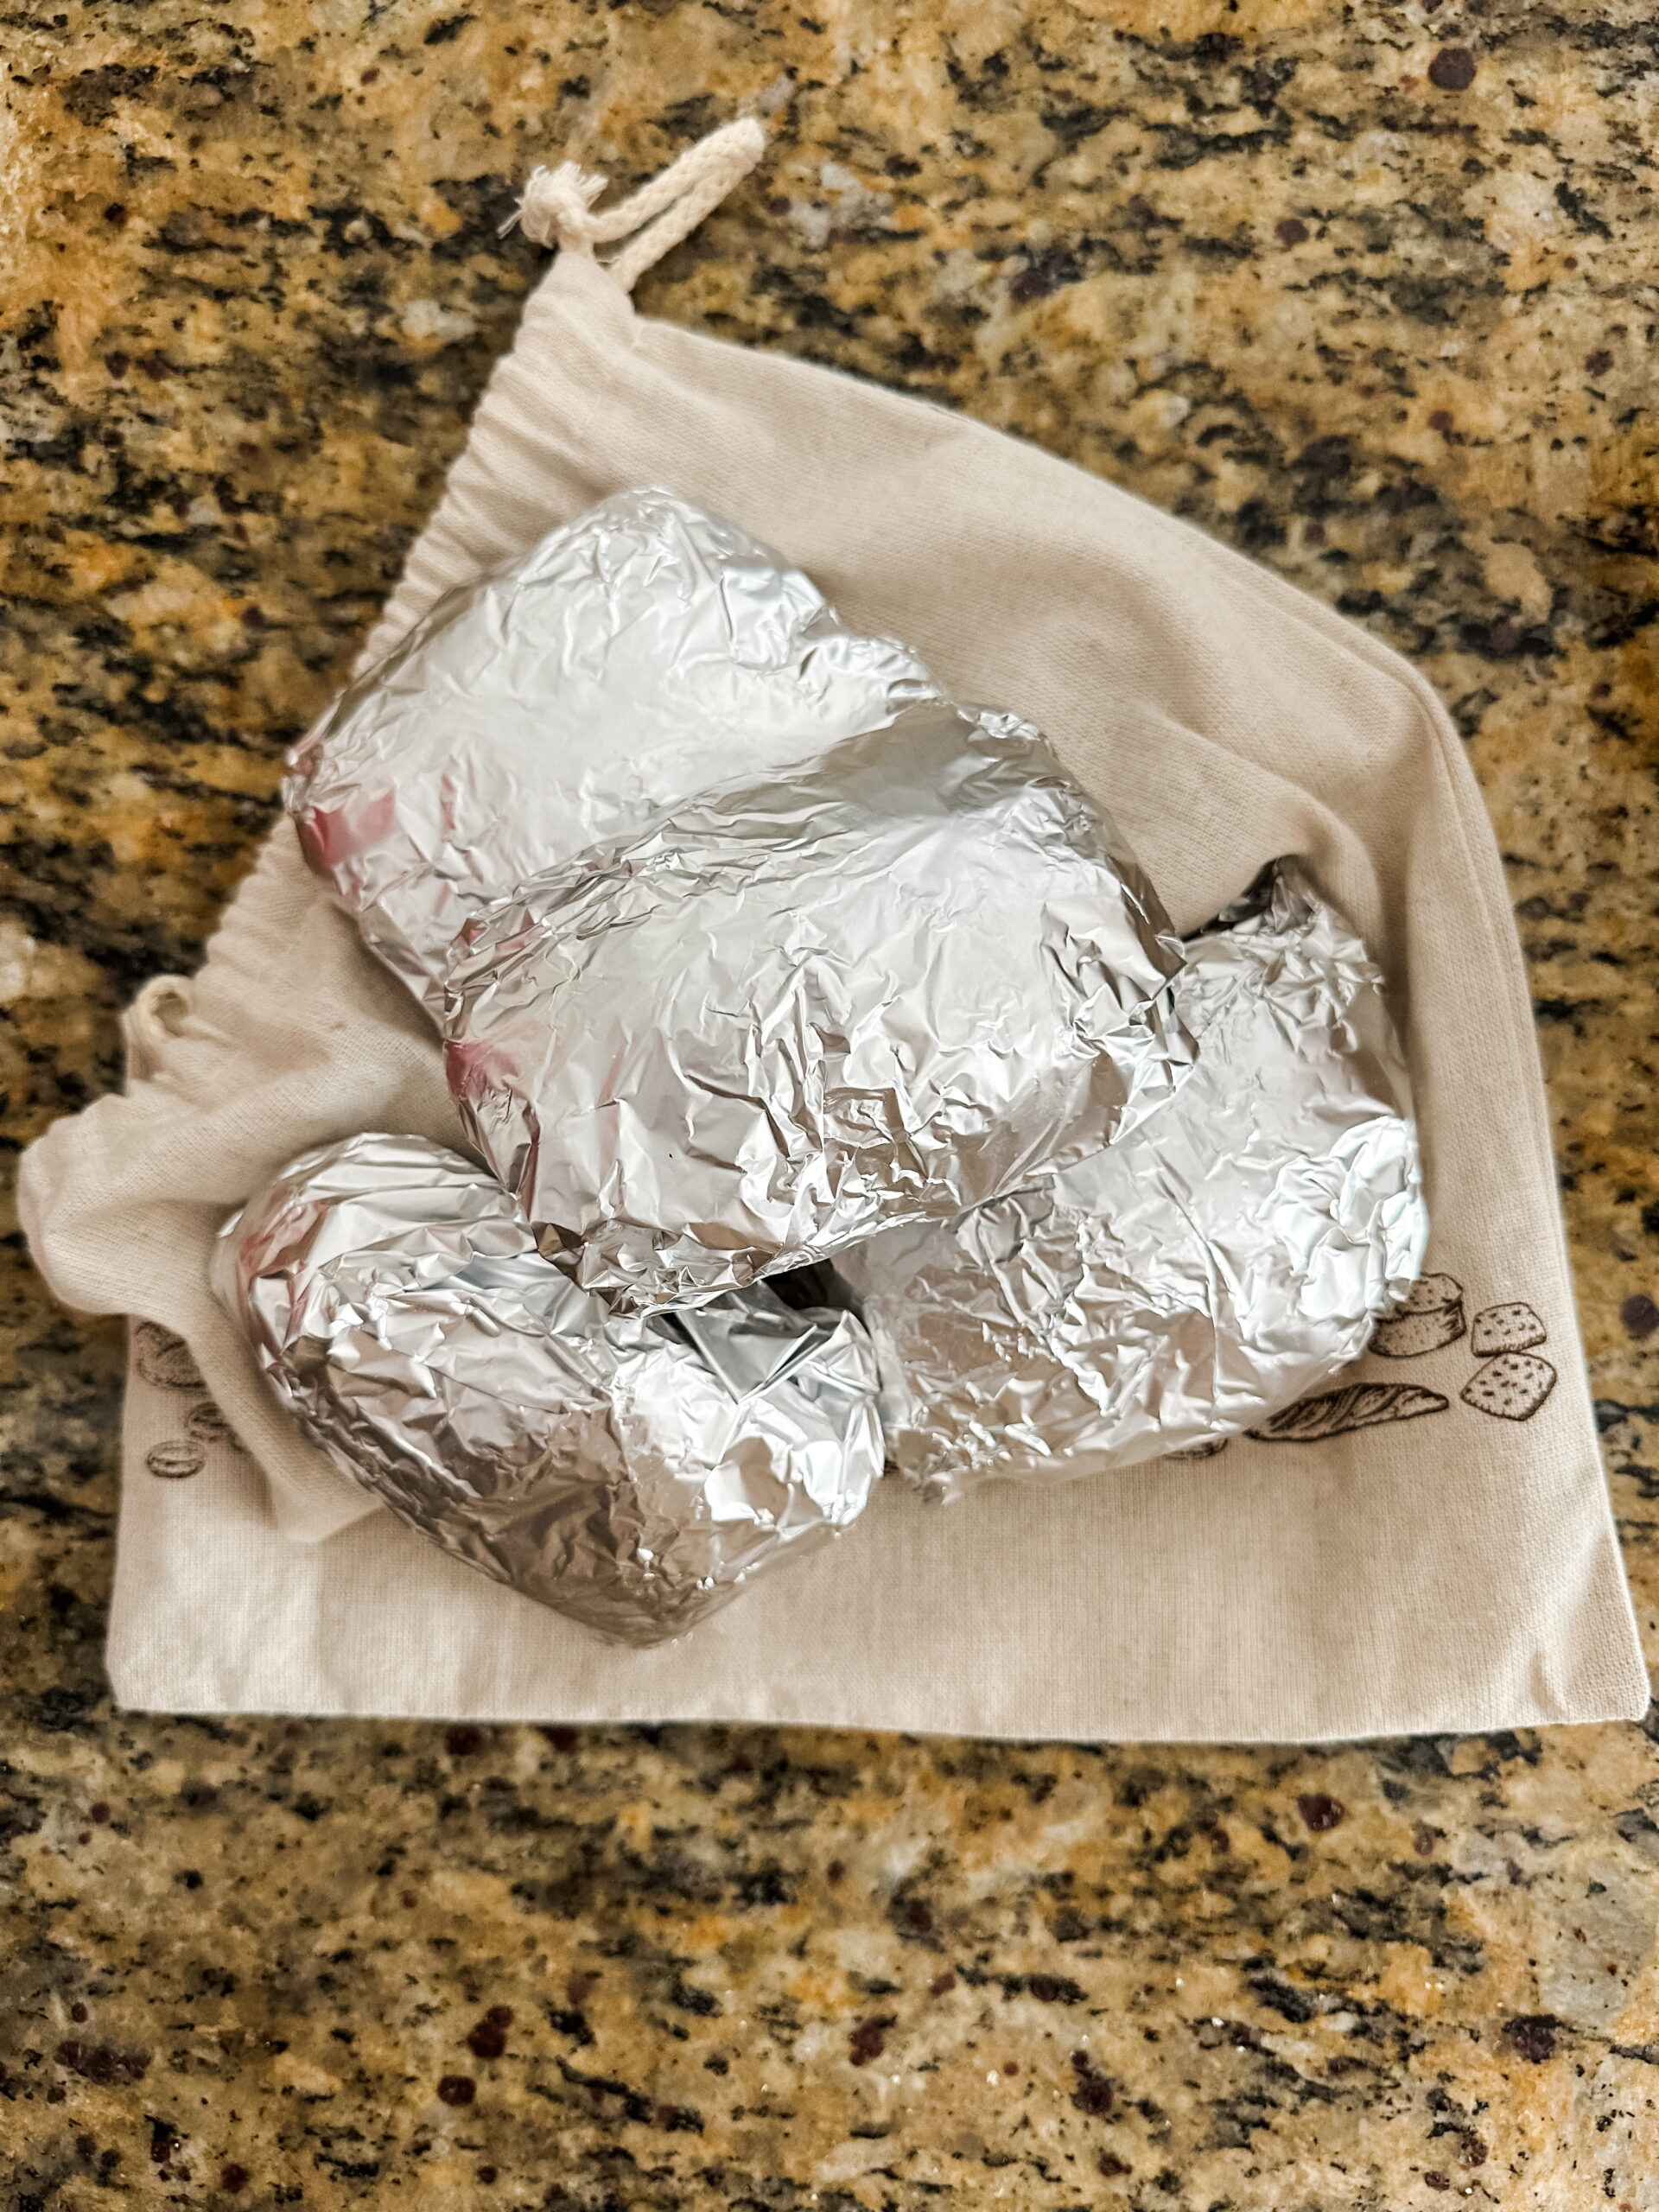
The best way to store your ciabatta bread is wrapped tightly in tin foil and left at room temperature. I place them all in a bread bag. These ones from Amazon work amazing. It will keep for about 2-3 days.
You can also freeze your bread by wrapping it in foil, then sealing it in a ziplock bag. The bread can be stored in the freezer for up to 3 months.
Ciabatta
Equipment
- 1 glass bowl
- plastic wrap
- 1 Stand mixer
- 1 dough hook
- 1 silicone scraper
- 1 container with air tight lid
- bread mat
- dough cutter
- cookie sheet
- parchment paper
Ingredients
Sponge
- 1/2 cup warm water
- 1/2 tsp active yeast
- 1 cup all purpose flour
Dough
- 2 cups all purpose flour
- 1 1/2 tsp salt
- 1 cup room temperature water
Instructions
Make the Sponge
- Heat the water to between 100-105 degrees and pour into glass bowl.
- Add the yeast and allow to sit and activate.
- Add in the flour and stir to combine.
- Cover with plastic wrap and let sit at room temperature for a least 8 hours and up to 24 hours.
Make the Dough
- Add the sponge to your mixer bowl and attach the dough hook.
- Add dough ingredients and mix on low for 1-2 minutes.
- Bump speed up and knead for 5-7 minutes or until dough is pulling away from the sides of the bowl.
- Your dough should be shiny, smooth, and very sticky.
- Transfer your dough to a container with an air tight lid using a silicone scraper. Cover and let rest for 1 hour.
- Wet your hands, and complete a round of stretch and folds.
- Cover and let rest for 30 minutes.
- Complete 2 more rounds of stretch and folds (for a total of 3 rounds) with a 30 minute rest after each one.
- After the last rest, liberally flour your working surface and turn out your dough.
- With well floured hands, press your dough into a rectangle.
- Using a dough cutter, cut your dough in half length wise.
- Cut each half into 4 sections. You can reshape your sections into more of a rectangle shape if you choose.
- Sprinkle the top of the dough with flour, cover with a tea towel, and let proof for 2 hours.
- An hour before baking, set you oven to 450 degrees and preheat a cookie sheet.
- Gently transfer your dough to some parchment paper using the silicone scraper.
- Carefully transfer the parchment paper onto the preheated cookie sheet.
- Bake for 25-30 minutes or until golden brown.
- Let cool for 20-30 minutes.
- Enjoy!
Notes
Tag @guidos.kitchen on Instagram and hashtag it #guidoskitchen
Leave a Reply