If you are looking to take your bread making to the next level, this is the recipe for you. The delicious taste, soft consistency, and beautiful swirl will get you compliment after compliment.
Easy enough for beginner bakers, this step by step guide will help you expand your skill set.

Cinnamon Raisin Bread was my favorite as a child. I have such comforting memories of morning breakfasts with this delicious soft bread that had that signature swirl. So when I started baking, I knew I had to do a cinnamon raisin bread recipe.
I have to say I was a bit intimidated at first. That swirl seemed super complicated. But as I got more and more comfortable baking, and started learning how things worked together, I decided to give it a go. It is SO much easier than I thought.
On top of baking a childhood favorite, I am also creating a healthier (and let’s be honest, cheaper) option to now serve to my kids. Who I might add, devour this bread every time.
If you are newer to baking, feat not. This is a great recipe to get those baking skills boosted and try something new. This was my first recipe outside of the “easier” no knead, stick it in a pan, kind of breads. I promise you can do it. Just follow these simple steps and you will be hearing your family sing your praises in no time.
Let’s get started.
Ingredients
- Bread flour: I use bread flour for all my bread recipes. While you can use All Purpose flour, bread flour has a higher protein content, 12-14%. All purpose as a protein content of closer to 10-12% is better for more “tender” baking like cookies and cakes and muffins. My go to Bread Flour is King Arthur’s Organic Bread flour
- Active yeast: While you can use instant yeast, I like to be sure my yeast has activated and I know my bread will rise properly. I use Fleischmann’s Active Yeast. *Don’t forget to store your yeast in the fridge or freezer!
- Milk: Adding milk to your recipe will give you bread greater volume and a darker crust. It also gives your bread that softer consistency. Make sure to heat your milk to about 100-105 degrees to help your yeast activate.
- Honey: I recommend a local organic honey. This will give your dough that sweetness without the processed sugar. If you cannot use honey, you can substitute agave or maple syrup.
- Butter: Adding butter to your dough can limit the gluten development. It will also tenderize your dough and create a softer bread with a rich flavor.
- Salt: You can’t have a delicious recipe of anything without salt! I recommend a course sea salt or Kosher salt over table salt, as they will have a better taste.
- Cinnamon: Cinnamon has incredible benefits beyond just tasting amazing. It is high in antioxidants, it has anti-inflammatory properties, it can improve gut health, improve dental hygiene, and reduce cholesterol.
- Sugar: While I try to make my recipes generally processed sugar free, you can use sugar if you choose. For this recipe, you can swap out the honey in the cinnamon sugar mixture for 1/4 cup brown sugar.
Let’s Get Baking
Heat your milk to about 100-105 degrees. I use a (clean) meat thermometer to check the temp. Add your honey and your yeast and set aside. How quickly your yeast activates will depend on the temp in your house, but mine is usually active within 10-15 minutes.


You will know your yeast is active when you see a nice foam on top and it has the signature “bread smell.” Once your dough is active, pour in your melted butter.


Fix your dough hook onto your stand mixer. In the mixer bowl, combine your flour, salt, eggs, and raisins.

Add your activated yeast. Don’t forget to “lock” before you “knead.”
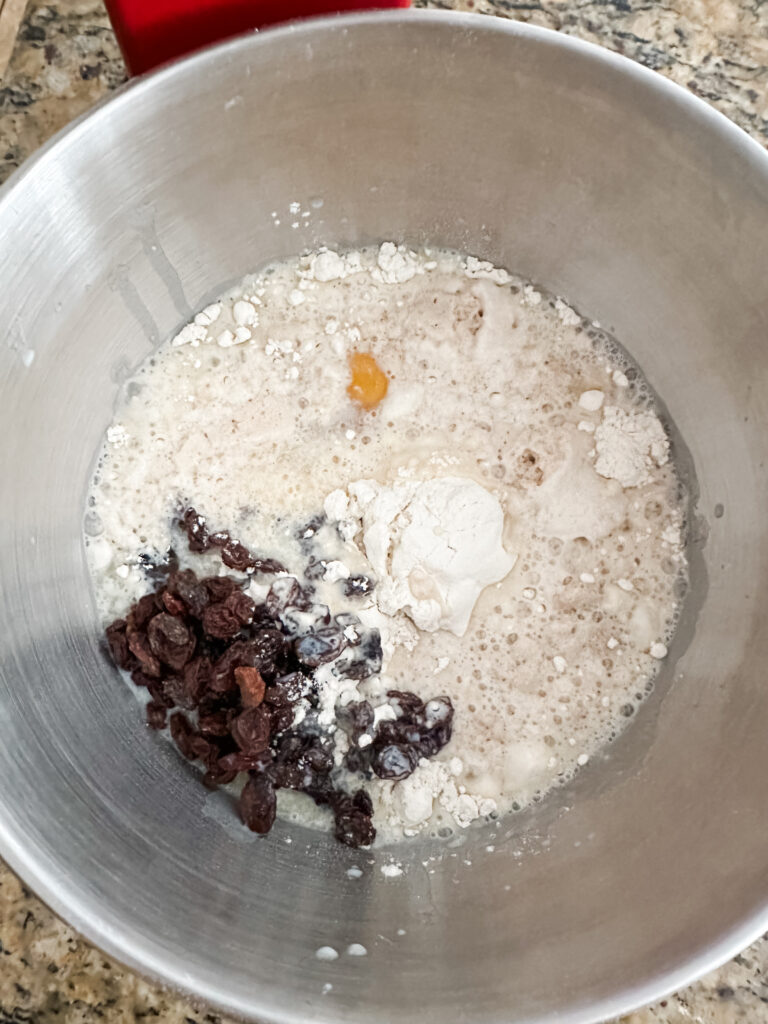
Knead on low for a couple of minutes, then bump it up one speed and knead for an additional 3-5 minutes until fully combined. The dough will be ready when it has pulled everything the sides of the bowl.
You want you dough to be sticky. I gauge this by seeing how long it hangs on the dough hook. If it sticks for a bit and stretches, you know its good!
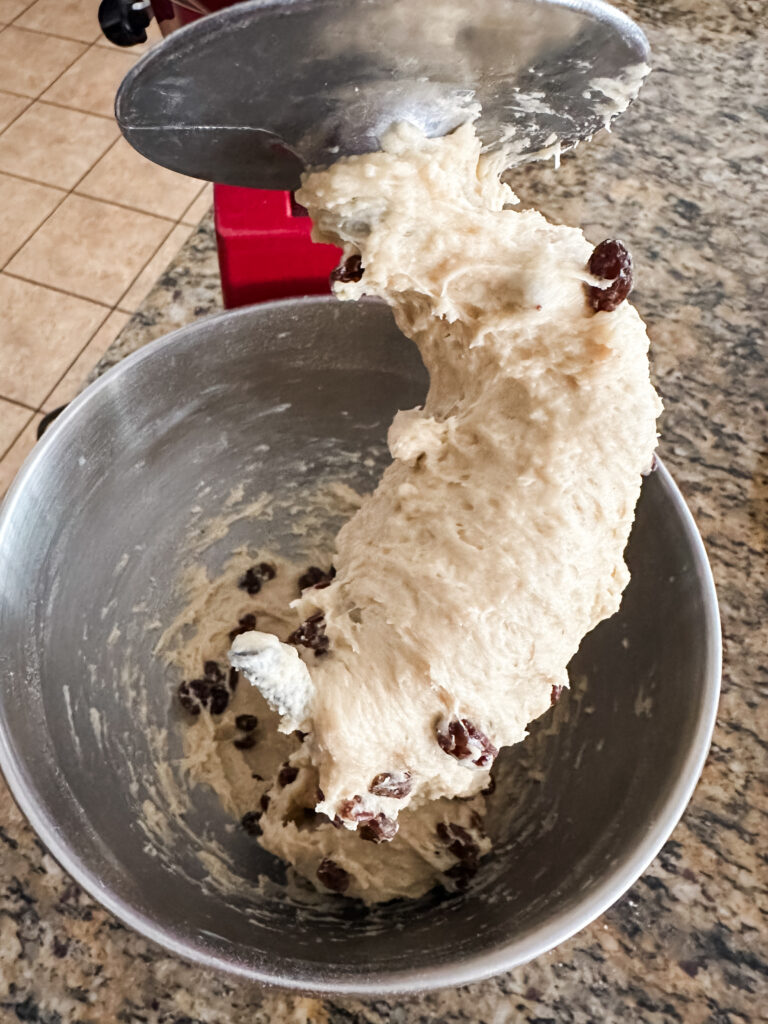
Lightly oil a large bowl and transfer your dough. Turn your dough to lightly coat it in the oil. I have found that this makes stickier dough much easier to handle.
Cover your dough and let it rise for about 2 hours. I usually place my dough in my oven (turned off) while it is rising. If it is a warmer day I will let it rise on the counter.


Once your dough has risen, lightly flour a bread mat, or your counter top, and turn out your dough.
You are going to spread your dough out into a long rectangle, about the same length as your loaf pan. You can lightly flour your fingers or dip them in water to make it easier to work with the dough.

In a small bowl, combine your honey, cinnamon, butter, and salt. Stir your mixture until combined and smooth.
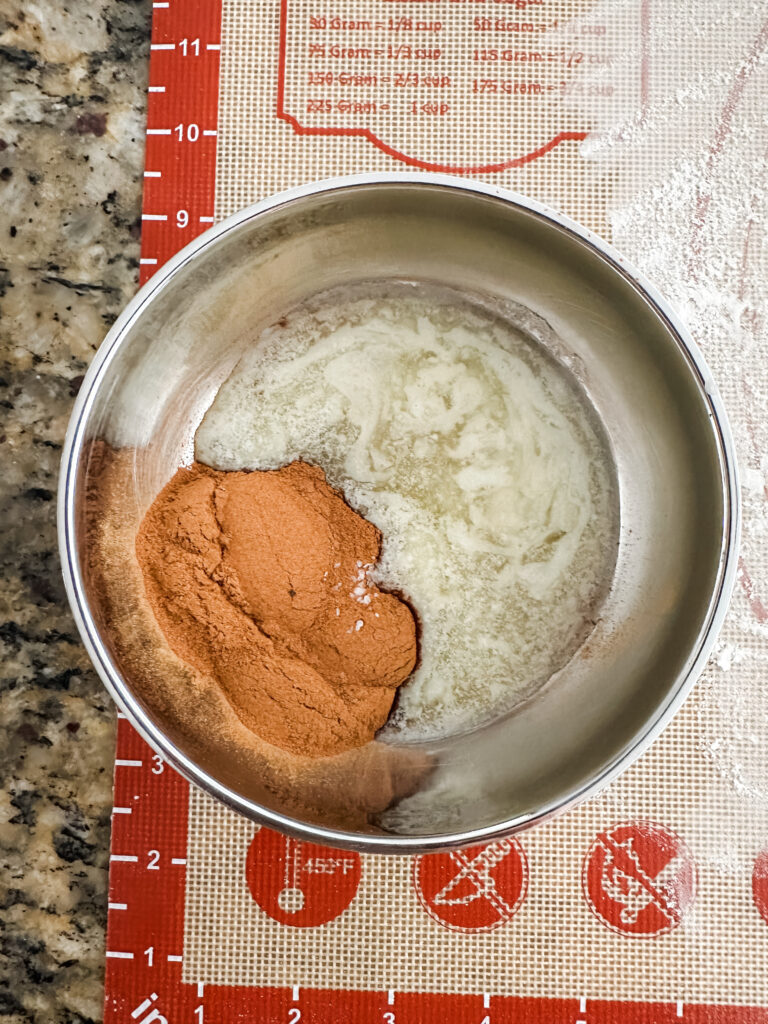
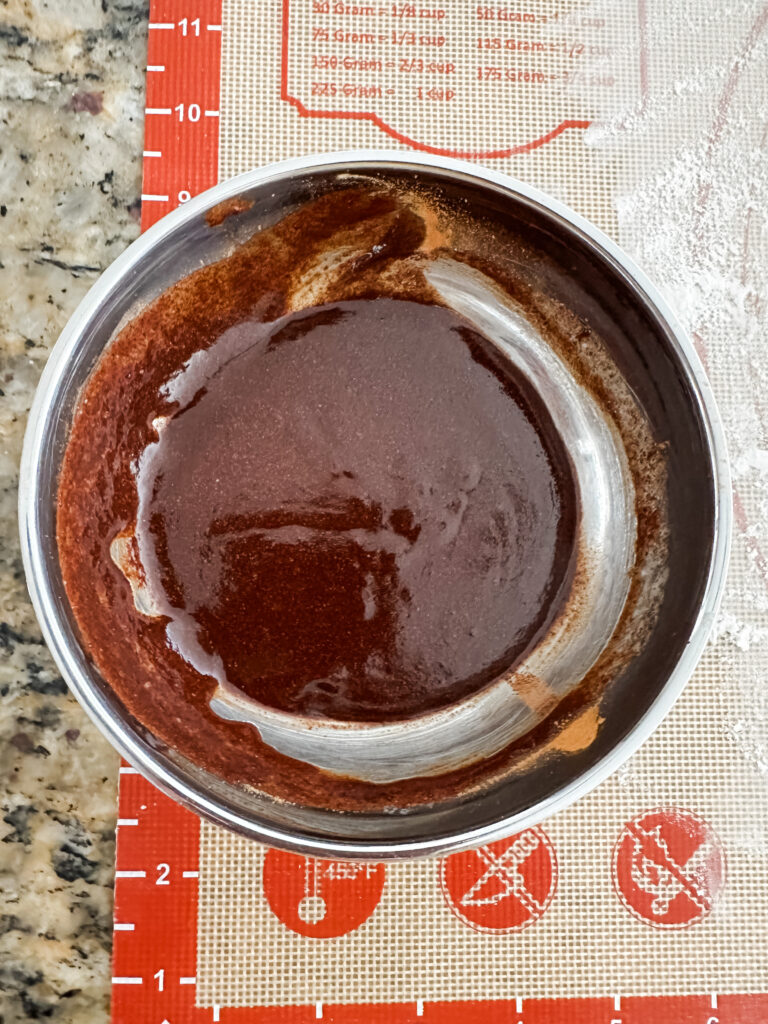
Spread your cinnamon mixture over the top of your dough.

Roll your dough tightly from the bottom to the top, much like a cinnamon roll. This step can be the “hardest” so take your time. I make sure to lightly flour my fingers or dip them in water. I gently pull the bottom as I roll to make it as tight as possible. The tighter you can make it, the better the swirl will be.
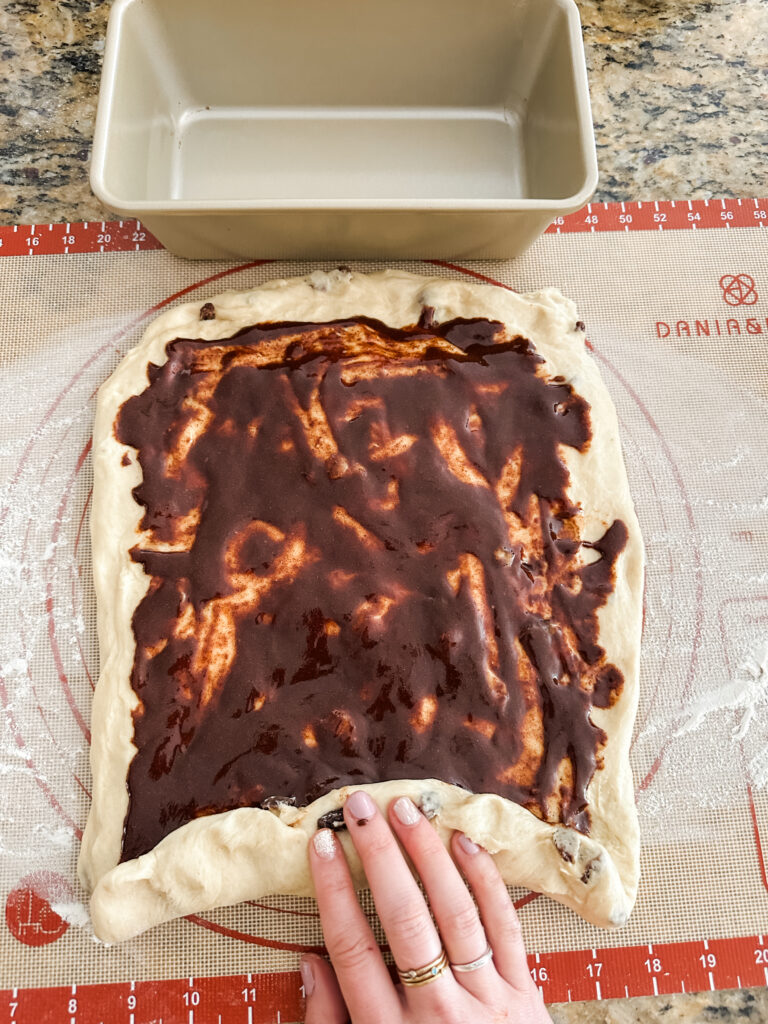
Once you have your dough rolled, slightly fold over the ends. Pinch all the seams shut.


Place your dough in your greased loaf pan with the seam side down. Cover and let your dough rest for another hour. I let this rest happen on the counter since you will start preheating your oven before the dough finishes it’s rise.


During the last 10 minutes of the rise, preheat your oven to 375 degrees and boil a pot of water.
Right before you place your dough in the oven, pour the boiling water into a cookie sheet or baking pan and place it on the bottom rack of your oven. The steam keeps the top of your dough stretchy so it doesn’t dry out while it is rising. It will also help your dough create a thin chewy crust while holding that soft center.


Being careful of the steam, place your loaf in the oven and bake for 40-50 minutes or until the internal temp reaches 190-200 degrees. (Be prepared for your house to start smelling like magic)
Turn your dough out onto a cooling rack (or the grate on your stove top) and let it cool. BE PATIENT! Slicing the loaf too soon will cause the spiral to crumble and fall apart.


Once your bread has cooled, slice and enjoy! (and be ready for the round of applause you will receive.)


My favorite way to eat this bread is toasted with some butter. The butter soaks into the soft crumb of the bread and the swirls get a gentle crunch when toasted.
You could also use this bread for an elevated french toast, or bring this bread to your next brunch potluck and quickly become the most popular person there!
Although this is technically a “breakfast” bread, I have been known to munch on this at any time of the day.
I hope you enjoy this recipe as much as I do!

Cinnamon Raisin Bread
Equipment
- 1 Stand mixer
- dough hook
- 1 large bowl
- 1 small bowl
- measure cups
- measuring spoons
- bread mat
- 1 loaf pan
Ingredients
- 1 cup milk heated to 100-105 degrees
- 3 tbsp honey
- 2 1/4 tsp active yeast
- 4 tbsp melted butter
- 3 1/2 cups flour
- 1 tsp salt
- 2 eggs
- 1/2 cup raisins
Cinnamon Filling
- 1/4 cup honey
- 2 tbsp cinnamon
- 2 tbsp melted butter
- 1/8 tsp salt
Instructions
- Heat milk to 100-105 degrees
- Add yeast and honey and set aside to activate.
- Once yeast is active, pour in melted butter.
- In mixer bowl, combine flour, salt, eggs, and raisins.
- Add yeast and knead until well combined. Dough should be sticky.
- Lightly oil a large bowl and transfer your dough.
- Cover and let rest for 2 hours.
- Turn dough out onto a lightly floured surface.
- Spread into a rectangle roughly the length of your loaf pan.
- In a small bowl, combine honey, cinnamon, butter, and salt. Stir to combine.
- Spread your cinnamon mixture over your dough.
- Roll your dough from bottom to top, keeping it tight like a cinnamon roll. You can lightly flour your fingers to help roll tightly. Pinch the seam shut.
- Place your dough in a greased loaf pan, seam down.
- Cover and let rest for another hour.
- Preheat your oven to 375 degrees.
- Boil a pot of water.
- Before you place your dough in the oven, pour the boiling water into a cookie sheet and place it on the bottom rack of your oven.
- Bake for 40-50 minutes or internal temp reached between 190-200 degrees.
- Turn out onto a cooling rack and let cool.
- Slice and enjoy!
Notes
- For the best taste and texture, I recommend using bread flour. If you only have All Purpose flour that will work fine in a 1:1 ratio.
- This recipe does not use processed sugar, however you can substitute 4 tbs of white sugar to the yeast, and 1/4 cup brown sugar to the cinnamon sugar mixture. If you cannot use honey, you can substitute agave or maple syrup.
- Bread Storage: I suggest storing this bread in the fridge if you do not plan to eat it in a couple of days. You can also freeze the bread after it has been baked. Allow the bread to cool completely, then freeze for up to 3 months. When you are ready, allow your bread to thaw at room temperature then reheat as needed.
- Tools Needed: Electric Stand Mixer with dough attachment, large bowl, small bowl, bread mat, nonstick pans.
Tag @guidos.kitchen on Instagram and hashtag it #guidoskitchen
Leave a Reply