This is the first loaf I ever made. This is a no knead recipe and uses minimal ingredients, which makes it the ultimate beginners bread.
If you are looking for something to get you started baking, follow these step by step instructions and you will look like a professional in no time!

For a very long time I was on the “gluten free” train. I have had gut health issues on and off for years, and it seemed that gluten aggravated them. I tried to switch as much as possible to a gluten free option, including bread.
Unfortunately, gluten free options, while becoming much more popular and accessible, are also MUCH more expensive. We are a family of 5 and trying to sustain lunches and breakfasts and all the other bread related things with the small overpriced gluten free loaves from the the store was just not feasible.
So I decided to start making my own. “It will be easy” I thought, “Everyone is making bread”. It was not easy. Turns out making gluten free bread is very difficult due to one very important missing factor…gluten.
Gluten is what helps your dough rise by aiding in the fermentation process and creating those desired air bubbles. Without the gluten, my “gluten free” bread kept turning out like homemade paper weights. Dense and heavy and VERY inedible.
Now I know there are plenty of bakers out there who have mastered the gluten free baking process, and to them I tip my hat. I, however, was loosing patience and quickly ready to through my brick loaves out the window and quit.
Then I started doing some more research. I discovered that individuals are often intolerant of gluten, not because of the gluten itself, but because of the way the gluten is treated and because of ALL THE OTHER things that go into those store bought breads. So I decided to try again, using high quality organic bread flour, and making a super simple loaf of artisan bread.
The result is what catapulted me into the bread making frenzy I am in now. Not only did my loaf turn out amazing and was a huge hit with my family (who quickly devoured it), but I had no gut issues at all.
Since then I have been on a mission to create healthy options for myself and my family, and it all started with this recipe. So let’s get started!
What you will need
One of the best things about this bread, is the ingredients are simple and minimal. You just need 4 items that you may already have in your pantry.
- Bread flour: I use bread flour for all my bread recipes. As mentioned before, the higher protein content, 12-14%, in bread flour gives your loaf that chewy structure. All purpose as a protein content of closer to 10-12% is better for more “tender” baking like cookies and cakes and muffins. My go to Bread Flour is King Arthur’s Organic Bread flour
- Active yeast: While you can use instant yeast, I like to be sure my yeast has activated and I know my bread will rise properly. I use Fleischmann’s Active Yeast. *Don’t forget to store your yeast in the fridge or freezer!
- Water: Making sure your water is between 100-105 degrees will help your yeast activate.
- Salt: You can’t have a delicious recipe of anything without salt! I recommend a course sea salt or Kosher salt over table salt, as they will have a better taste.
Let’s make some bread
Heat your water to about 100-105 degrees. Add your yeast, stir, and set aside.


You will know your yeast is active when you see a layer of foam on top of your water. It can take anywhere from 10-15 minutes for your yeast to activate depending on the temperature in your kitchen. *Note: adding honey or sugar to your yeast can help boost the activation process


In your stand mixer bowl, add the flour and salt. Add your activated yeast and attach your dough hook. Knead until well combined. I usually start on the lowest speed for a couple of minutes, then bump it up one speed for 3-5 minutes.


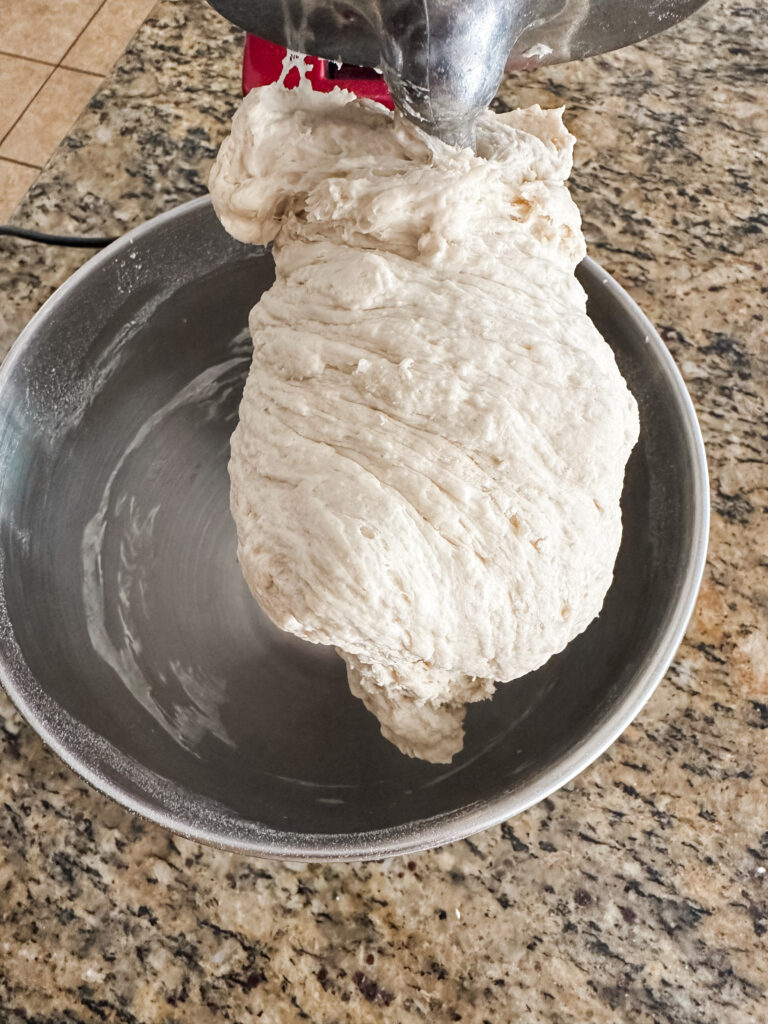
You want your dough to be slightly sticky. You will know it is ready when it pulls everything from the side of the bowl and sticks to the dough hook. I do the touch test as well. It should be stretchy and sticky to the touch.


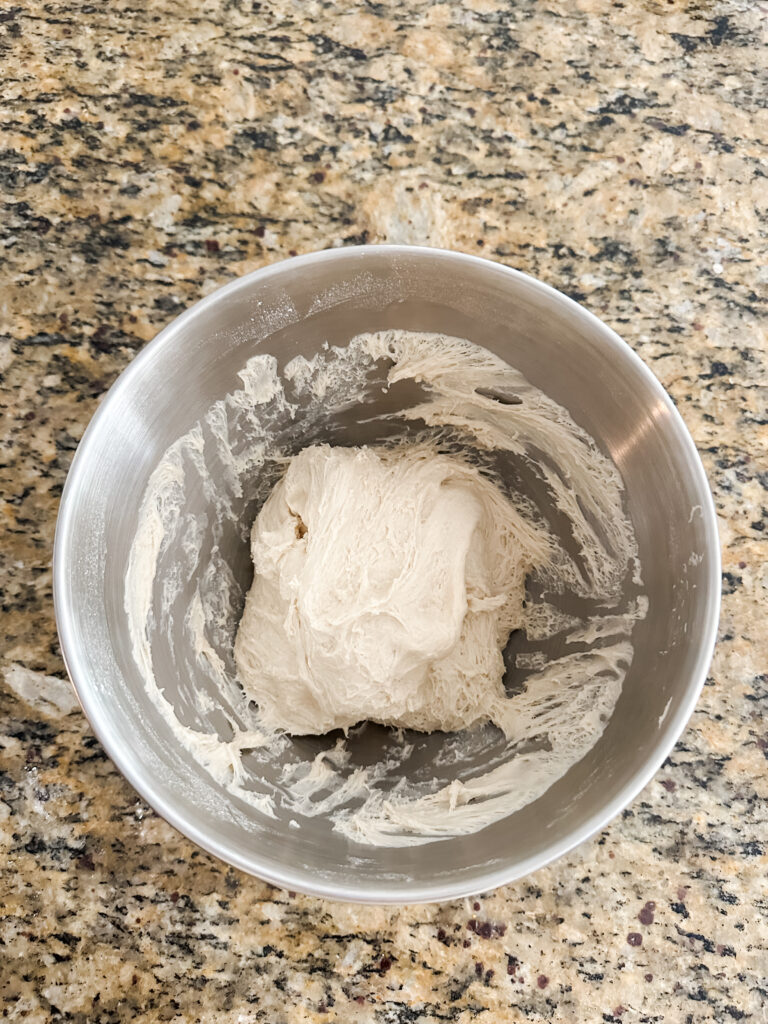
Cover and let your dough rise for about 2 hours. I place my dough in the oven (off of course) with the light off. During the warmer months I will let it rise on the counter.


Look at those bubbles! I love watching this fermentation process happen.
After your dough has risen, you are going to do one round of stretch and folds. Scooping your fingers underneath your dough, you are going to “stretch” it upwards, and then “fold” it into the center. Do this all the way around your dough.


Once you have finished your stretch and folds, cover your dough and let it rise for another 30 minutes.


While your dough is resting, set your oven to 450 degrees and preheat your dutch oven.

Turn your dough out on a lightly floured surface. You are going to form your dough into a ball by gently pulling the edges into the center.


Once you have pulled everything into the center, flip your dough so those seams are facing down.
Gently rotate your dough using the palms of your hands to create nice round shape.


Carefully transfer your dough onto a piece of parchment paper.

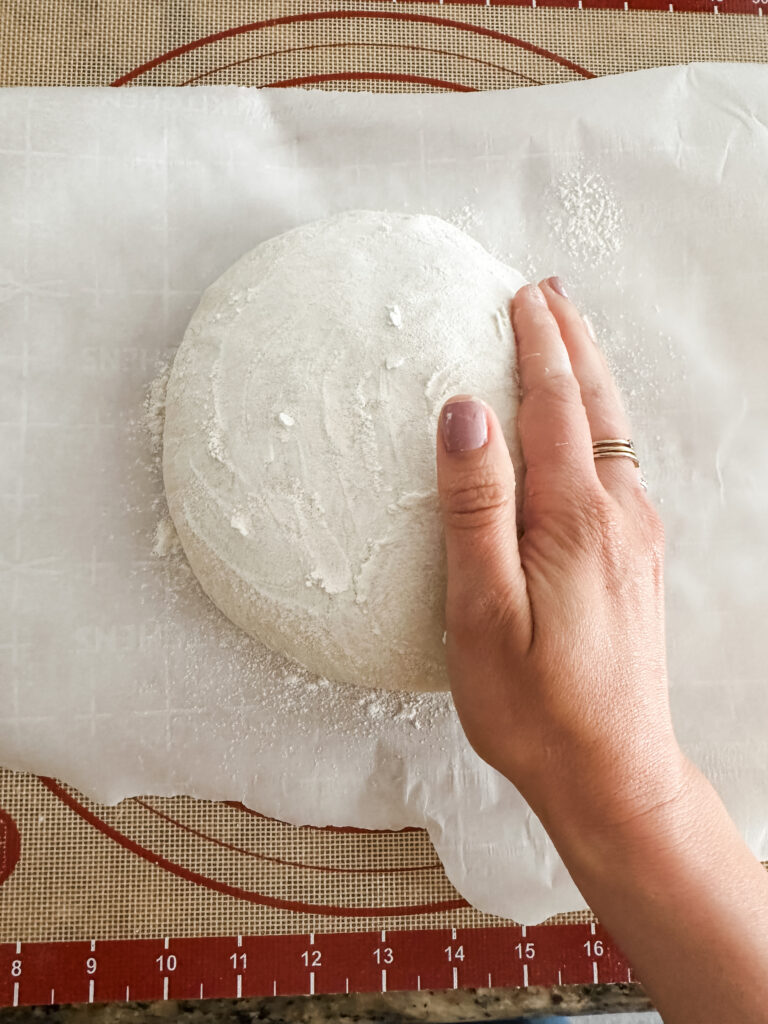
Gently flour the top of your dough, and smooth everything out with your hand.


Using a lathe or sharp knife, score your dough. There really is no rhyme or reason here. Scoring is simply a way to control the rise of your bread as it expands during baking. The most common score is a diagonal line across the top. I visually like the cross pattern.


Carefully place your dough into your preheated dutch oven.

Bake for 30 minutes with the lid on. Remove the lid and bake for an additional 10-15 minutes, or until the top is golden brown.


Let your bread cool on a cooling rack. I let my bread cool on the grates of my stove top, which works just as well!


Once your bread has cooled, slice and enjoy!


What is this bread good for?
There are so many delicious ways you can enjoy this bread.
- Sandwiches – Turkey and cheese, BLT, or a delicious grilled cheese.
- Avocado toast or breakfast sandwiches
- Dipping in soup
- Toasted with butter and honey
- Dippers for appetizers like spinach artichoke dip, or caprese salad.
No matter how you slice it…see what I did there?…this bread is sure to be a favorite. I hope you enjoy!

Easy Artisan Bread
Equipment
- 1 Stand mixer with dough hook attachment
- 1 glass measuring cup
- measuring cups
- measuring spoons
- 1 dutch oven
- bread mat
- lathe
Ingredients
- 1 1/2 cup warm water
- 2 1/4 tsp active yeast
- 3 3/4 cup bread flour
- 2 tsp salt
Instructions
- Heat your water to between 100-105 degrees.
- Add yeast, stir, and set aside to activate.
- In mixer bowl, add flour and salt.
- Add your activated yeast and knead until a sticky dough forms.
- Cover and let rise for 2 hours.
- Do one round of stretch and folds.
- Cover and let rise for another 30 minutes.
- Set your oven to 450 degrees and preheat your dutch oven.
- Turn dough out onto a lightly floured surface.
- With lightly floured hands, shape dough into a ball by pulling the edges into the center, and placing it seams down.
- Carefully transfer your dough onto parchment paper.
- Lightly flour and score the top.
- Carefully place your dough into your preheated dutch oven.
- Bake with the lid on for 30 minutes.
- Remove the lid and bake for an additional 10-15 minutes, or until golden brown.
- Remove bread and place on a cooling rack.
- Once bread is cool, slice and enjoy!
Notes
- Flour: I recommend using bread flour. The high protein percentage of bread flour is going to give that dense artisan feel to this loaf. If you only have All Purpose flour that will work fine in a 1:1 ratio.
- I highly recommend using kosher salt or course sea salt to give your bread the best taste.
- Freezing Instructions: You store this bread in the freezer after it has been baked. Allow the bread to cool completely, then freeze for up to 3 months. When you are ready, allow your bread to thaw at room temperature then reheat as needed.
- Bread Storage: I store my bread in an open ziplock bag, inside a linen bread bag. I have found this keeps the bread soft while still giving it room to breath.
Tag @guidos.kitchen on Instagram and hashtag it #guidoskitchen
Leave a Reply